 |
| First remove the six screws on the top. |
 |
| Remove the lid. The fan connectors are in the middle of the amplifier. |
 |
| Remove the screws, four for each fan. The cover comes off too. |
 |
| This is a picture of the fan connectors on the board. The cables are glued to the connectors which are in turn glued to the board. I decided to remove all the glue with a dremel. |
 |
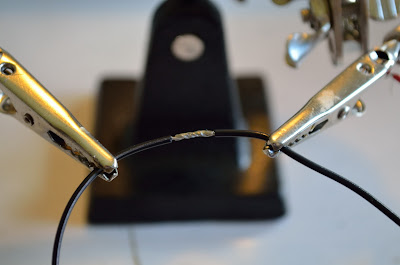
| Since the connectors are 2-pin and the fans are 3-pin you have to do some soldering. Twin the wires like this. |
 |
| Solder it like this. |
 |
| Don't forget this! Very important to avoid short circuits. |
 |
| Fans installed. I decided to use a Zalman fan-controller. |
 |
| Fastened to the side with a double-adhesive strip that came with it. |
 |
| The back side. Note that I used rubber "screws" for the top two holes. They came with one of the fans (the fans are identical but I got one from a friend and bought the other). |
The fans are Fractal Design Real Silent 80mm (http://www.fractal-design.com/?view=product&prod=16) and they are in fact really silent. I tried hooking it up on the kitchen table with the cover off and the only sound I heard was some faint tapping noise from the fans, probably because they were running at such a low speed. The fan controller was set to maximum speed but I still felt like they were running a bit slow. Might be the amplifier has some sort of voltage reduction on low loads. The amplifier is now completely silent. You can't hear it's on unless you put your ear to the back of it. The fan controller isn't really necessary with these fans but it had been lying in the box unopened for three years now so why not use it?
The mod itself is really easy and all you need to know is how to solder together a pair of wires.
Total time: ~2 hours. Total cost: 80SEK ($12). Would I recommend this mod? YES!
Does the Behringer NU6000 comes with universal power supply?
ReplyDeleteThanks
I think it depends where you buy it. Check the product page here http://www.behringer.com/EN/Products/NU6000DSP.aspx
Delete