Pages

Friday 16 August 2013

AKG K490 NC

So I bought a pair of AKG K490 NC last week. In September I will start my ten month long around-the-world trip and Scotland is the first stop. I decided that I need a pair of good headphones to bring with me, and my Denon AH-D2000 are way to bulky for portable use. All that was left was my Koss Porta Pro and to be honest they don't sound that good and they have zero isolation properties.

I did some reading and the best noise-cancellation headphones were of course the Bose Quiet Comfort series. They are quite expensive though and some people said the sound quality was only decent and that they couldn't be used without batteries. I looked at other brands and found that AKG had two NC headphones, the K490 and K495. The K490 being slightly smaller and cheaper and performing better without batteries than the bigger brother K495. I found a store in the city that had the K490 so I tested them with my phone right there in the store and the noise-cancellation worked really well. Sound quality was ok, not as good as normal headphones in the same price range but it was still something I could think of living with. I went home, did some more research and then ordered a pair of K490 NC from the same store, thinking I could at least leave them back if I didn't like them. I had read that the NC wasn't very great for airplane-noise so I thought I would download some airplane-noise audio samples and simulate an airplane cabin in my room. The NC worked pretty ok. I haven't tried the Bose QC-series or any other NC headphones so I can't compare them to others really.


Since I got the headphones I have been burning them in a bit playing some music on the from my also newly purchased Macbook Air. This weekend it was time to mow the lawn because finally there was a rain-free day. Normally I would just go with a pair of ear protectors but this day I decided to try the K490 NC. Turned out it worked like a charm. Without the NC on it was barely possible to listen to music. I was listening to Nils Lofgren's Acoustic Live album and lots of details were lost and I had to to play really loud and my ears were hurting after just a minute or two. Switch the NC on and the lawn mower suddenly "disappears" and the music comes to life and I can turn down the volume several steps and still hear the music clearly. With the NC on they were pretty much equal to the ear protectors I normally use (Howard Leight Leightning L1).

Update 2013-08-17:
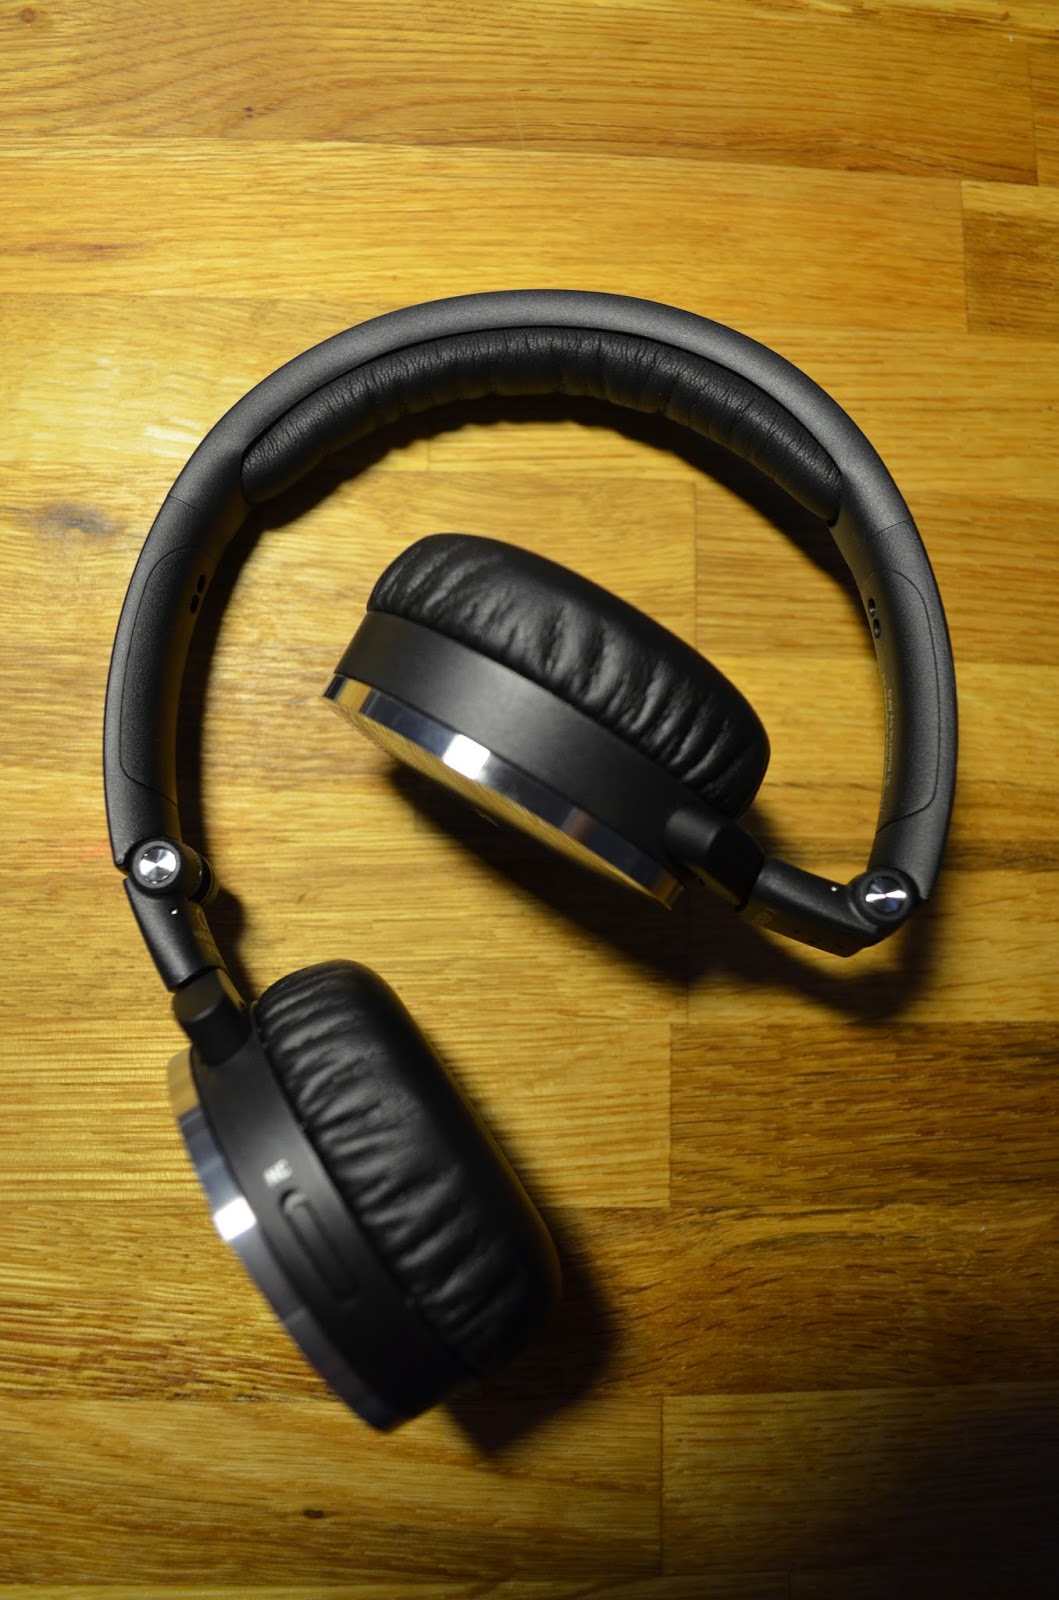
Here are the pictures I promised.


Monday 5 August 2013

Quick stereo recording of speakers

I was bored today so I did a quick stereo recording in my room.

The song is For My Father by Andy McKee. I set the mic at about 30cm distance from the speaker, on-axis with the tweeter. First recorded left channel only and then right channel only and mixed them together into one track.


Saturday 20 July 2013

Objective2 headphone amplifier construction guide

Buy your own O2-kit here

Start with measuring all the resistors and labeling them.
Smallest parts first, so solder all the small resistors like this.
Add the diodes, make sure to solder them in the right direction!!! Solder the medium size resistors now too.
The IC-sockets have such short legs to it's a good idea to add them early.
Add the two big resistors at the bottom of the board. Keep 2-3mm distance between the resistors and the board since they can get warm during operation.
Add some of the small capacitors.
Add the slightly bigger capacitors on the bottom right of the board.
Add the blue capacitors.
Solder the LED first, it's important that you get it close to the board and pointing straight forward. Next att the 3.5mm sockets, they snap in to place so they are easy to solder.
Add the power socket. Solder one leg first, reheat the joint and push it in place and then solder the remaining legs.
Add the switches. This can be a bit tricky. Solder only one leg first. Reheat the joint and push the switch into place and make sure it is close to the board and pointing straight forward. If not you will get trouble with the front panel. Solder the rest of the joints when you feel satisfied with the positioning. Add the white square capacitors.
Add the volume potentiometer, try it in the case with front panel on to make sure you put it in the right position.
Volume control soldered to the board. For this kit I had to use the two row in the front.
Now add the two round brown capacitors.
As you can see in the picture there is a bridge between them. Solder the outer legs first, push them in place and then solder the bridge between them. You will need quite a bit of solder here. If you look closely you can see that the on/off switch has only been soldered as one place so far.
Add the four big capacitors. Solder one leg first, push them in place and solder the rest.
Solder the battery connectors. If you are going to mount an ODAC on the board you should only solder the two connectors to the left. If you're not planning on using an ODAC, solder both pairs. Make sure they stand straight! Solder one leg first, push to place and solder the rest.
With battery connectors on board. I will be mounting an ODAC to the board so I only soldered the left pair.
Add the ESD-sensitive parts. Be careful with these and try to avoid touching the legs. Solder smallest first and finish with the biggest. The two big ones to the left must be close to the board, otherwise they will hit the roof of the case.
Reheat ALL joints on the board. This is because when you cut the legs off components the joints may crack and provide bad connection. Reheat all joints and the solder will flow out nice and smooth. Measure all resistances and voltages according to NwAvGuy's guide on his blog. If everything measures as it should, try with a pair of scrappy headphones. Don't forget to add the opamps, and make sure you put them in the right places and in the right directions! This is very very important and triple check this before starting it up for the first time.
Don't use your expensive headphones the first time you are playing it. If something is wrong, you don't want to kill your $300 headphones. 

Thursday 18 July 2013

Behringer iNuke NU6000 fan-mod

So today I decided to swap the fans of my Behringer iNuke NU6000 amplifier. I had to send the first one back because of some electrical buzzing sound coming from within the amplifier. Picked up the new one a couple of days ago and have been running it without fuss the since then. I had some spare time today, so why not do it and be done with it?

First remove the six screws on the top.
Remove the lid. The fan connectors are in the middle of the amplifier.
Remove the screws, four for each fan. The cover comes off too.
This is a picture of the fan connectors on the board. The cables are glued to the connectors which are in turn glued to the board. I decided to remove all the glue with a dremel.
Since the connectors are 2-pin and the fans are 3-pin you have to do some soldering. Twin the wires like this.
Solder it like this.
Don't forget this! Very important to avoid short circuits.
Fans installed. I decided to use a Zalman fan-controller.
Fastened to the side with a double-adhesive strip that came with it.
The back side. Note that I used rubber "screws" for the top two holes. They came with one of the fans (the fans are identical but I got one from a friend and bought the other).

The fans are Fractal Design Real Silent 80mm (http://www.fractal-design.com/?view=product&prod=16) and they are in fact really silent. I tried hooking it up on the kitchen table with the cover off and the only sound I heard was some faint tapping noise from the fans, probably because they were running at such a low speed. The fan controller was set to maximum speed but I still felt like they were running a bit slow. Might be the amplifier has some sort of voltage reduction on low loads. The amplifier is now completely silent. You can't hear it's on unless you put your ear to the back of it. The fan controller isn't really necessary with these fans but it had been lying in the box unopened for three years now so why not use it?

The mod itself is really easy and all you need to know is how to solder together a pair of wires.

Total time: ~2 hours. Total cost: 80SEK ($12). Would I recommend this mod? YES!

Sunday 2 June 2013

An evening of experimenting and measuring

This evening I have been experimenting further with the room's acoustical properties.

I started with moving one of the subwoofers forward about 1 meter and 0.5 meter to the right so it's against the wall. It is still facing forward though.

Unfortunately I haven't saved any measurements and I can't be arsed to make new ones now, so I might add a picture tomorrow or some other day. The big differences were that the problems at around 100Hz was reduced drastically and the peak at ~50Hz reduced slightly. Of course I added a time delay to the subwoofer so they are acoustically aligned.

I used the EQ-function in REW to get the proper values for the EQ biquads. REW's graphical interface is still going crazy even though I have updated Java and my grahpics card drivers. I don't know why, but it's annoying as hell. I managed to export the filter values though and I imported them to the MiniDSP. The Q of the EQ bands were much lower now than before, which of course is good, and in general less EQ was needed. I got a much more flat response now and another "dimension" has been added to the music now that I have the 100Hz region playing along as well.

I think I mentioned before that I had an electrical buzzing sound from the Behringer and that I was going to send it back. Well, I haven't heard any buzzing at all today. I will wait with sending it back, the shipping label is valid for another ~3½ weeks so there's no hurry. And if I shall send it back I will wait a couple of weeks and send it just before I go to Germany for ten days.


Another thing I did was to see the impact on the sound when adding lots of pillows and cushions to the room. I did two measurements, one without pillows, and one with pillows.

Without pillows the room looked like this:


And this was the measurement.


If you wonder why the subwoofers are still in the same place as before it is because I did this experiment before I started moving the subwoofer. The measurement is with the subwoofers playing and the EQ active. Take note on how the bass is somewhat flat actually. Ignore the black line, that's just the microphone calibration curve which I forgot to hide.

I then proceeded with filling the room with pillows. I couldn't get the whole room in one picture but there are more pillows to the right which aren't visible.


And this is how it measured.


Much less phase issues than without the damping, and the dips in the midrange are not as severe as before. High frequency levels are slightly reduced, not much though.

Both at the same time. Blue before, green after. No smoothing.
1/24 smoothing. Blue before, green after.
Conclusion: Did it sound better? Well, I'm not sure. Arbitrary damping might be good and it might make things worse. The measurements show that the damping reduced some phase issues and reduced the amplitude of the dips in the midrange. Another thing I did not include was reverberation time. I don't know how to measure that so therefore I decided to leave it out. Though my ears could tell me that there was much less reverberation with the pillows than without them.

Wednesday 29 May 2013

Hours with REW and the MiniDSP

I've spent most of the evening playing around with REW, the MiniDSP and my UMIK-1.

I started with measuring the response. Pretty flat since I had already set the main EQ stuff a couple of days earlier. But there was lots of room for improvement and I still have some nasty stuff going on at ~90-400Hz.

Today I have tried different crossovers, inverting phase and fine-tuning the EQ. This is the result so far, presented with 1/24 smoothing.


Right now the subwoofers are crossed over at 120Hz with a 24dB/octave Butterworth filter. The main speakers are crossed over at 80Hz with the same type of crossover as the subwoofers. Might be it's better to set it a few Hz higher to flatten the tiny peak at ~84Hz. And by the way I don't think the graph can be trusted below maybe 30Hz because right now the fans of the Behringer amp is blowing straight towards the mic (I have the muff on) but the background noise is slightly high because of it.

I also noticed an electrical buzzing sound coming from the Behringer, from behind the power button. It doesn't sound very healthy so I'll contact Thomann about it. I don't want to switch fans if I have to return the amplifier.

Speaking of fans I have decided to use Fractal Design 1400rpm 80mm fans. I bought one for cofffee-money from my friend Robin and I have ordered a second one from CDON. Hopefully it will arrive before the weekend. While searching through my boxes for some cables I stumbled upon two pairs of Noctua low-noise adaptors (basically a 3-pin 10cm extension cable with a resistor mounted on it) which will come in handy if I need to reduce the RPM of the new fans.

I guess I don't have to say it sounds really good now that the massive 50Hz peak is gone. There's more nuances in the bass now, it's not that one-note bass any longer.

Edit: Here's another picture with phase included.
Something is happening there at ~100Hz but I know too little about phase to draw any conclusions. My guess though is that it's because of the room dimensions.

Edit #2: I did some close up measurements of the right channel speaker.
This is with the mic 10cm from the upper woofer, on-axis. Only right channel speaker playing and being measured.

This is with the mic 10cm from the tweeter, on-axis. Only right channel speaker playing and being measured.
And here's a picture of both main speakers running full-range without crossovers and EQ.
As you can see the room has a HUGE impact on the sound. Close-up the speakers are pretty flat but ~2.8m away they are anything but flat. Room acoustics are important, very important...